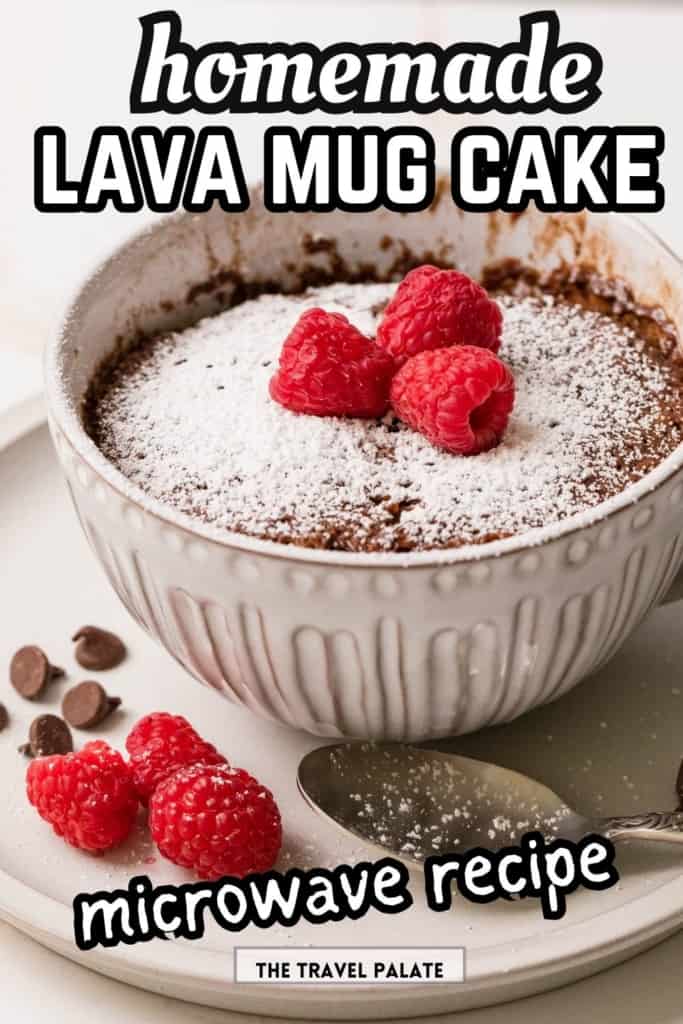
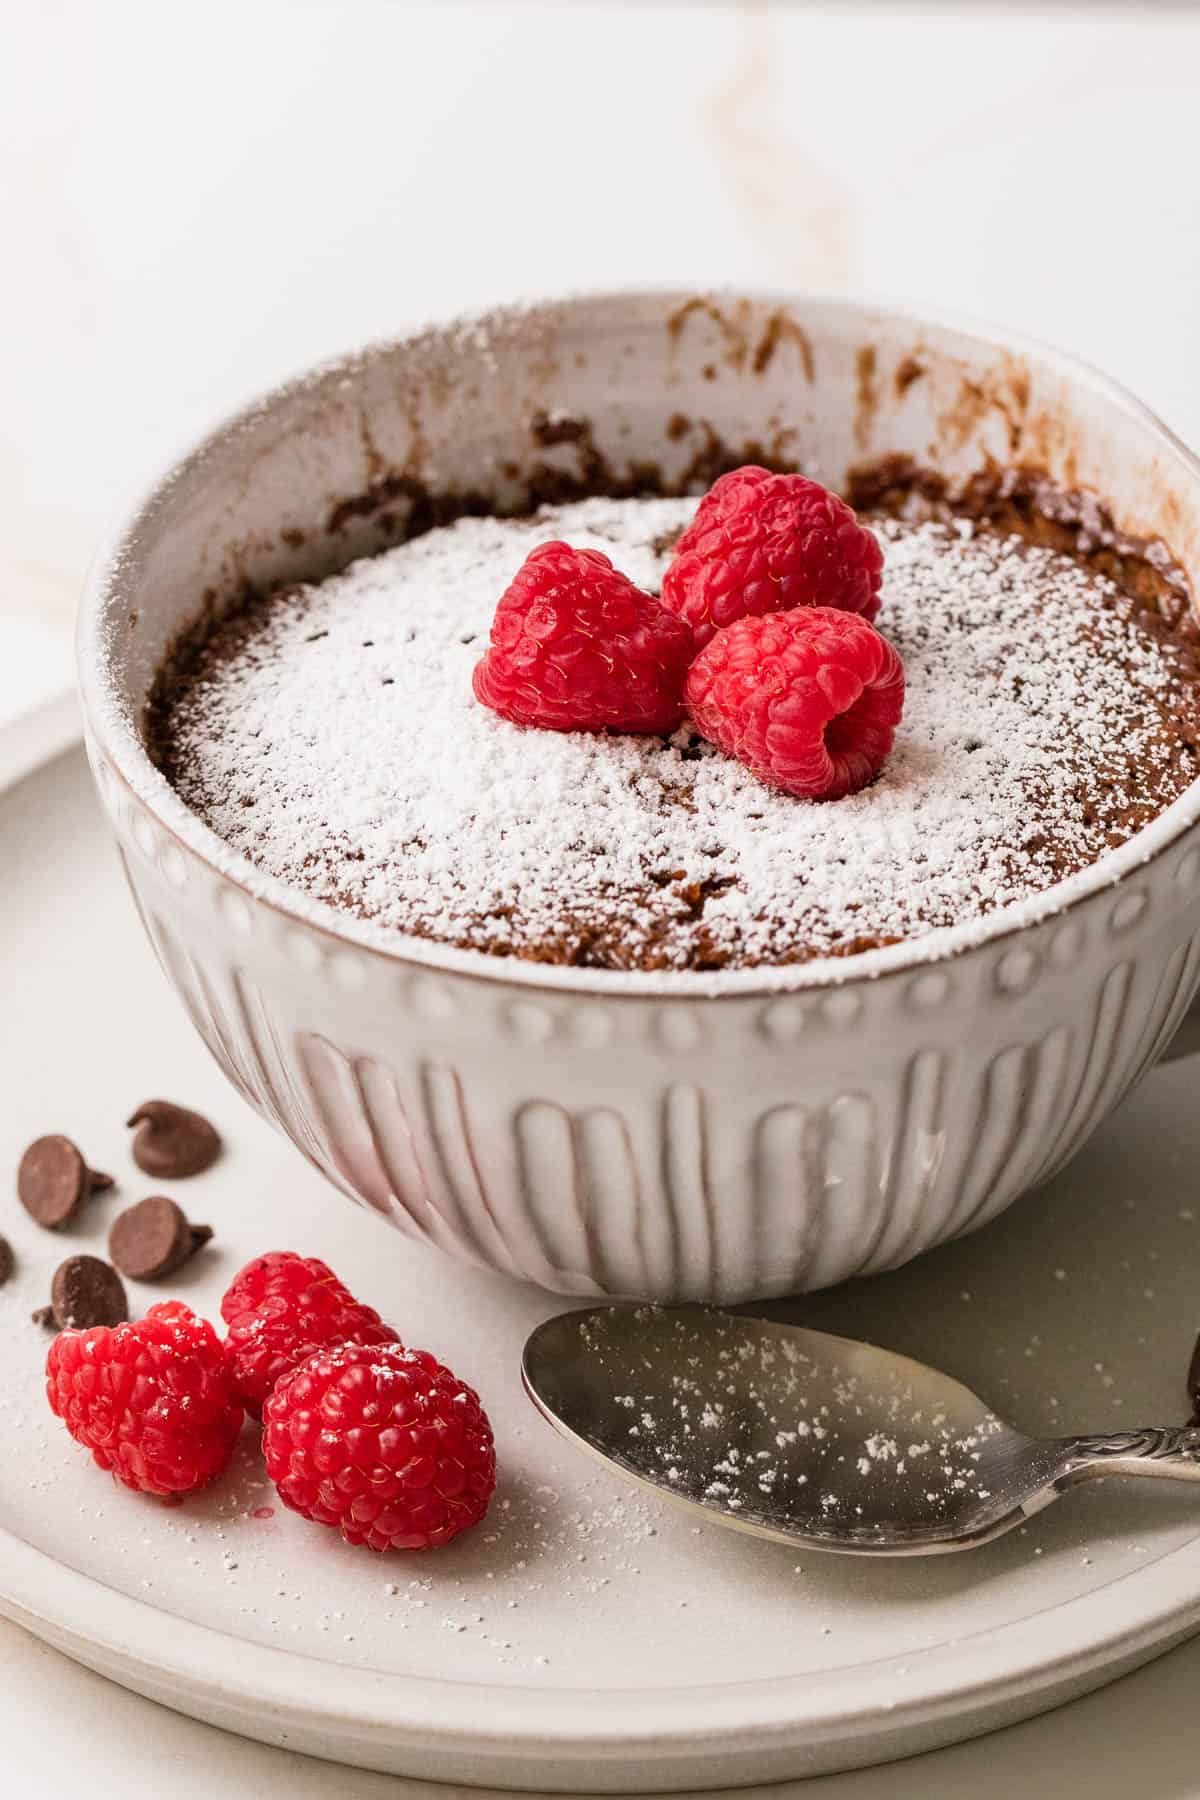
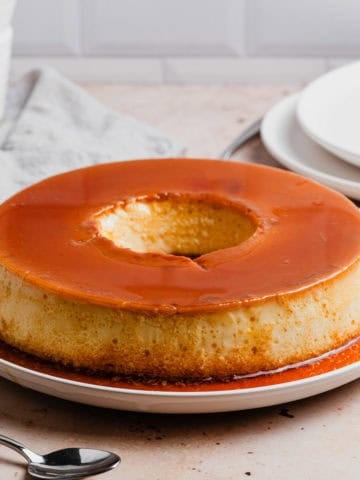
This microwave chocolate mug lava cake is for all you chocolate lovers out there. This dessert is the perfect solution for when you want to indulge in something full of chocolate flavor but don't want to bake an entire cake. The best part? You can make it in just a few minutes using ingredients you probably already have in your pantry.
If you love chocolate, try my No Bake Chocolate Pie!
Email me the recipe!
Plus get all our new recipes too!
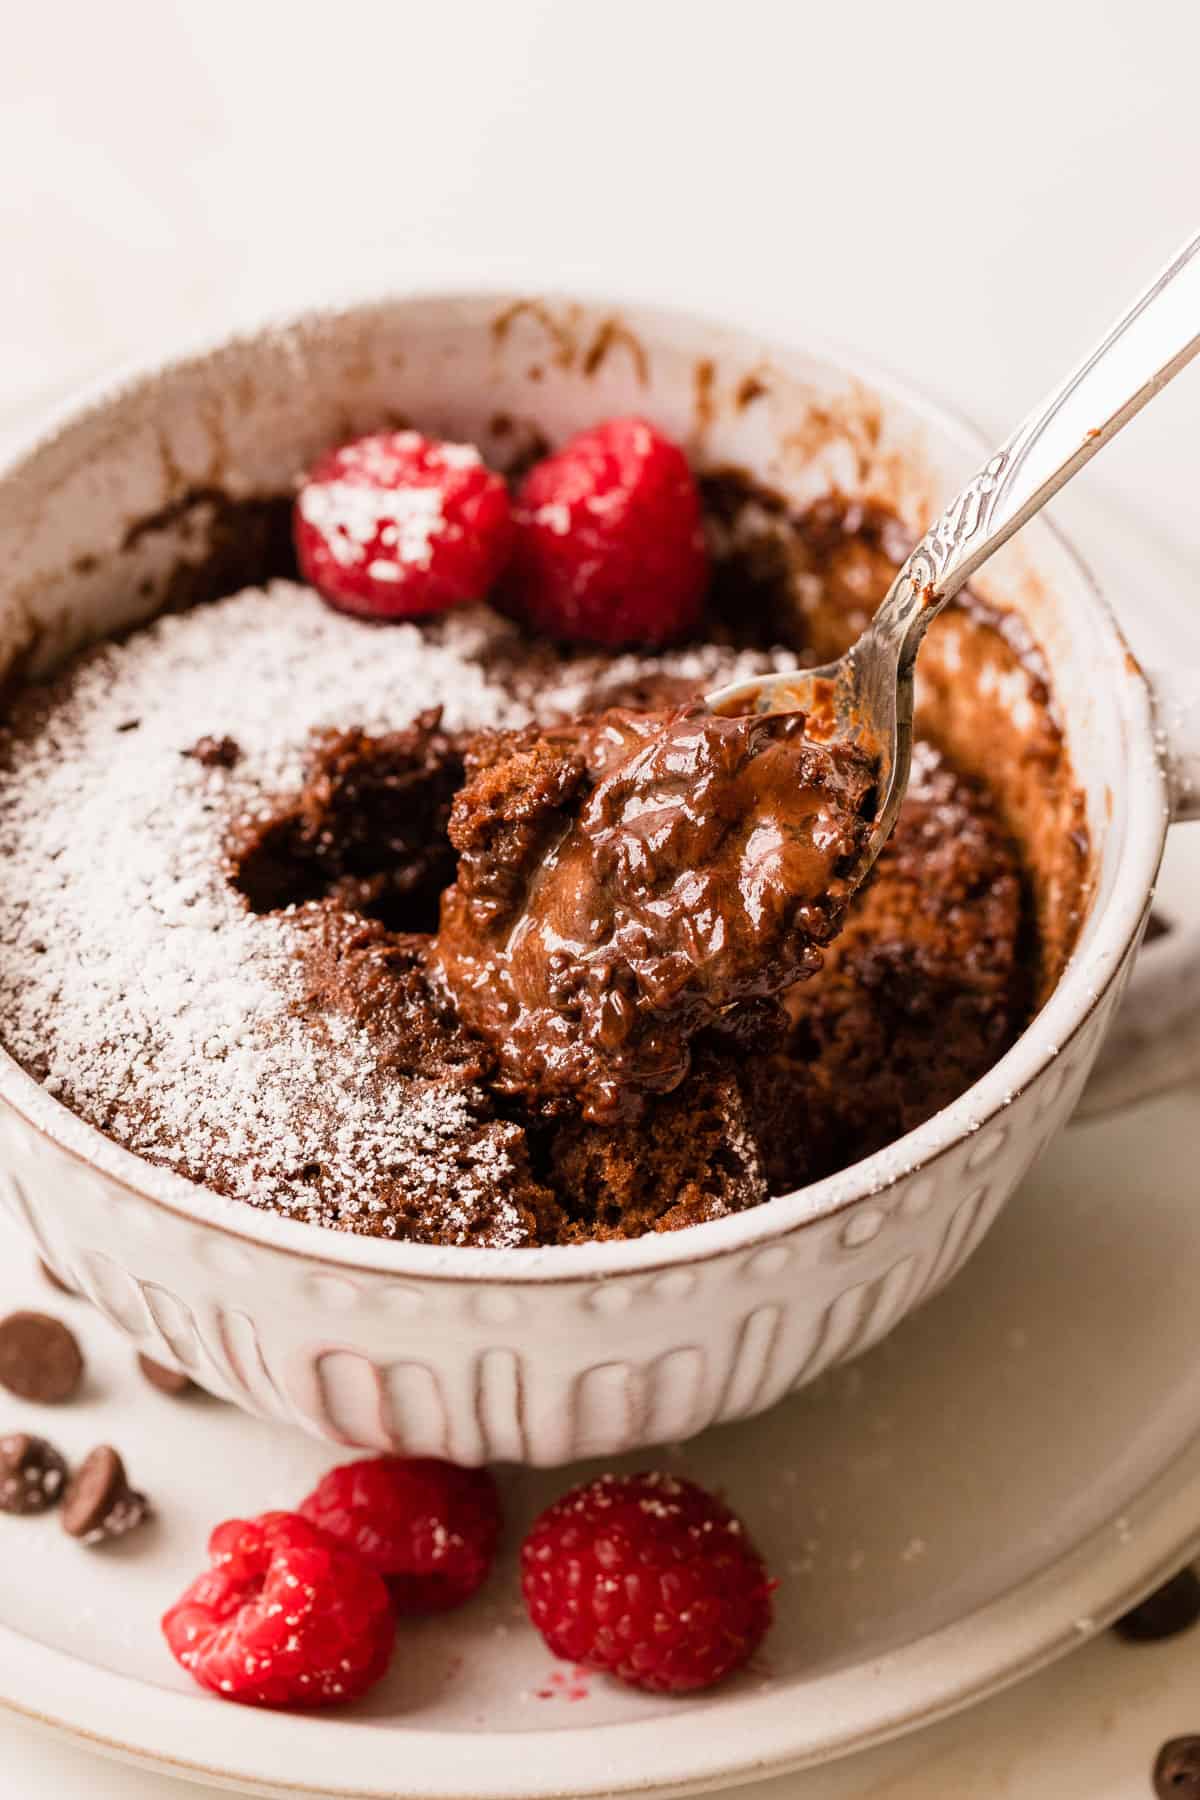
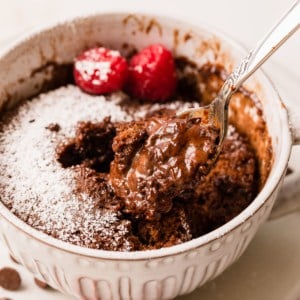
Imagine biting into a warm, gooey chocolate cake with a molten center that oozes out with every spoonful. That's exactly what you'll get with this recipe. You can make it in a coffee mug, so there's no need to dirty up a bunch of dishes. It's the perfect dessert for when you want something quick and easy, but still satisfying.
Why You'll Love It
Gooey Center
The best part of this dessert is the warm molten center that oozes out when you take a bite. It's like a warm chocolate river that melts in your mouth. The center is created by undercooking the cake batter, which is what makes it so delicious. It's the perfect dessert to satisfy all your chocolate cravings.
Easy to Make
This is a great recipe because it's easy to make and requires only a few ingredients, which you probably already have in your pantry. It takes less than 5 minutes to prepare and only 1 minute to cook in the microwave. It's a great dessert to make when you're short on time or when you're craving something sweet.
Just for two (or one!)
This molten chocolate cake is the perfect size for one or two, depending on your sweet tooth! I have been known to eat the whole cake by myself, but sometimes I don't mind sharing. You decide if you want this cake to be a single serving or not!
Versatile
This recipe is versatile, which means you can customize it to your liking. You can add different toppings like whipped cream, ice cream, or fresh berries. You can also add flavors like peanut butter, caramel, or mint extract. The possibilities are endless, so you can make it your own.
Equipment
- Coffee mug - I use 16 ounce size
- Microwave oven
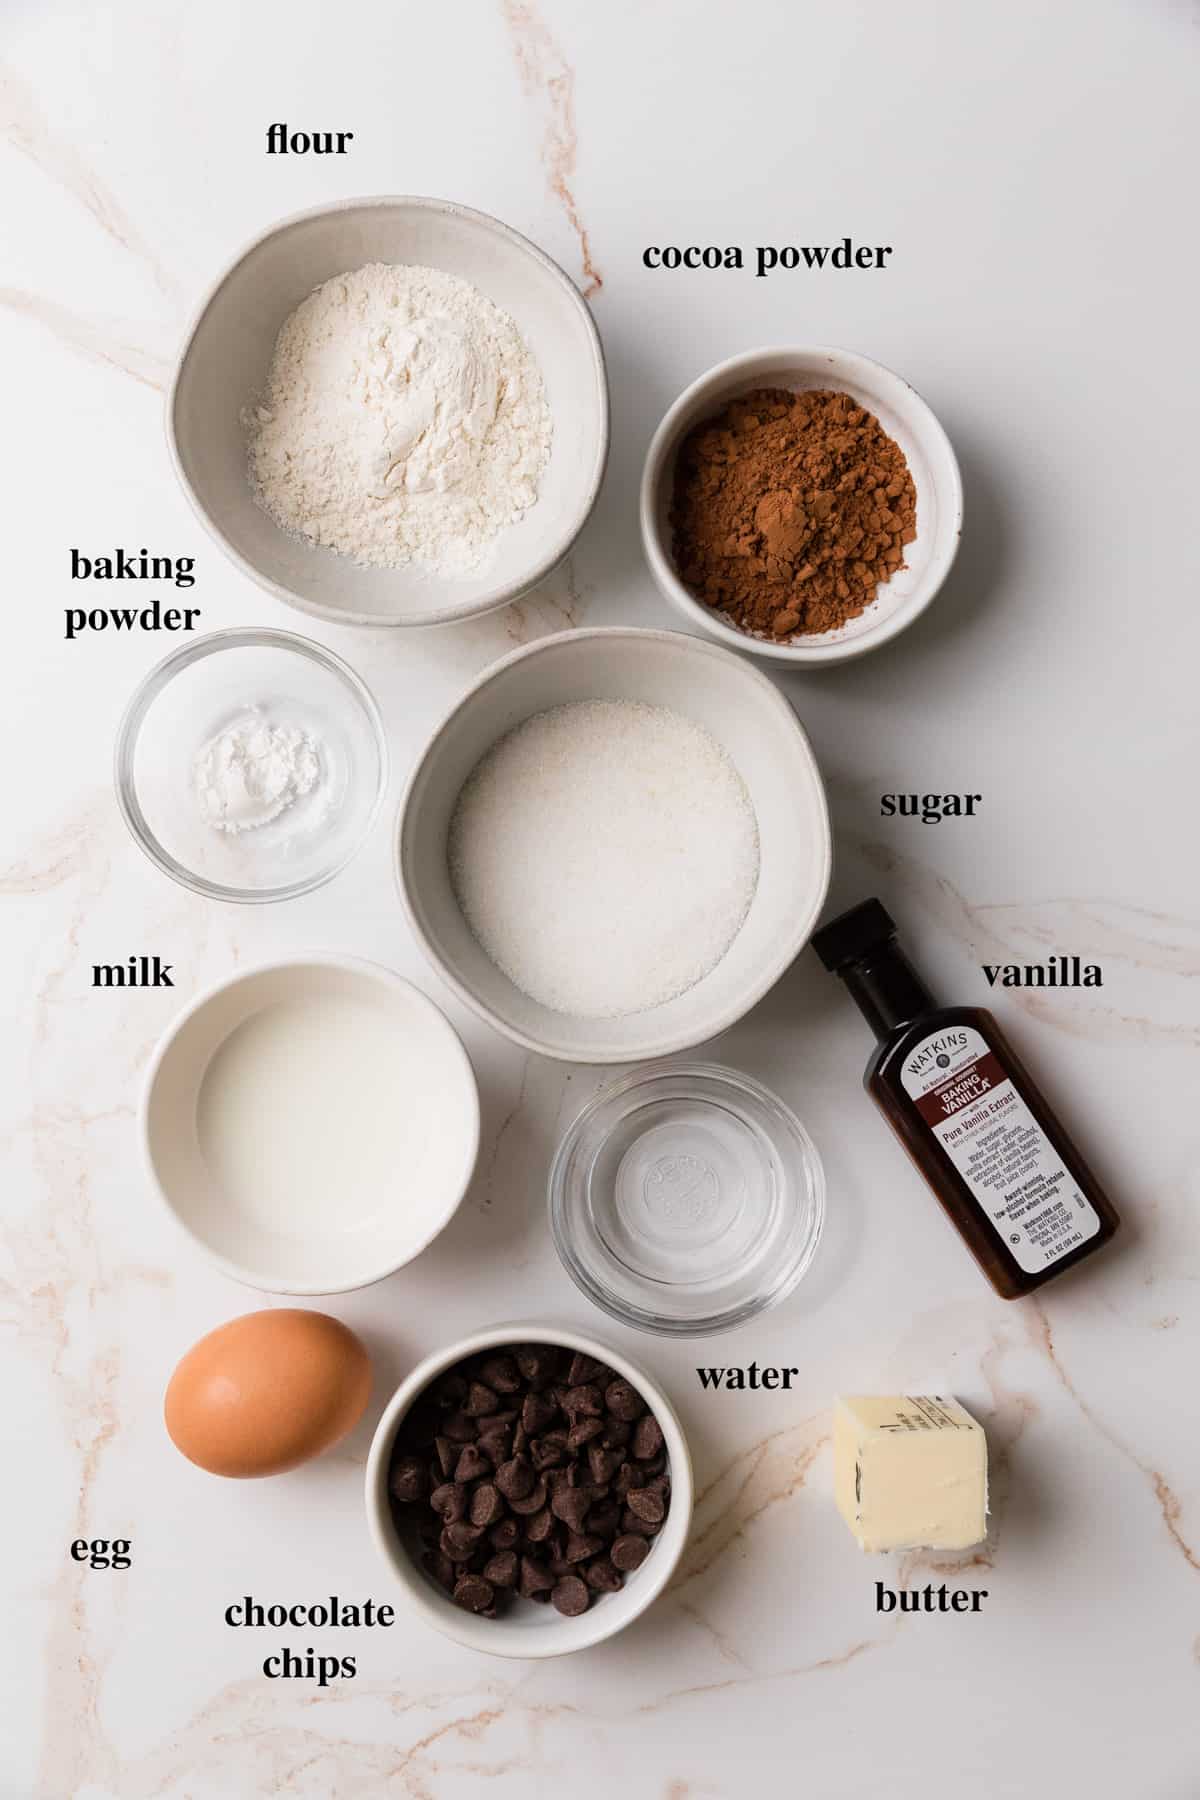
Ingredients
- Flour - I used all purpose flour to make the recipe.
- Sugar - I used white granulated sugar.
- Unsweetened cocoa powder - I used standard cocoa powder, not Dutch process.
- Baking powder
- Butter - I used regular salted butter. If you prefer to bake with unsalted butter, be sure to add a pinch of salt to the recipe. Coconut oil can be used as an alternative.
- Milk - I prefer to bake with whole or 2% milk, so the recipe was made that way. Low fat or skim should be just fine as well as a plant based alternative like oat milk or almond milk.
- Egg - a large egg works best.
- Vanilla extract - this really enhances the chocolate flavor so don't skip this ingredient. You can also try almond extract or another as mentioned below.
- Chocolate chips - I like semi-sweet chocolate chips or dark chocolate so the cake doesn't get too sweet. You could also use some dark chocolate squares too. Chocolate chunks are also a great option. You can also experiment with white chocolate chips.
- Water
Instructions
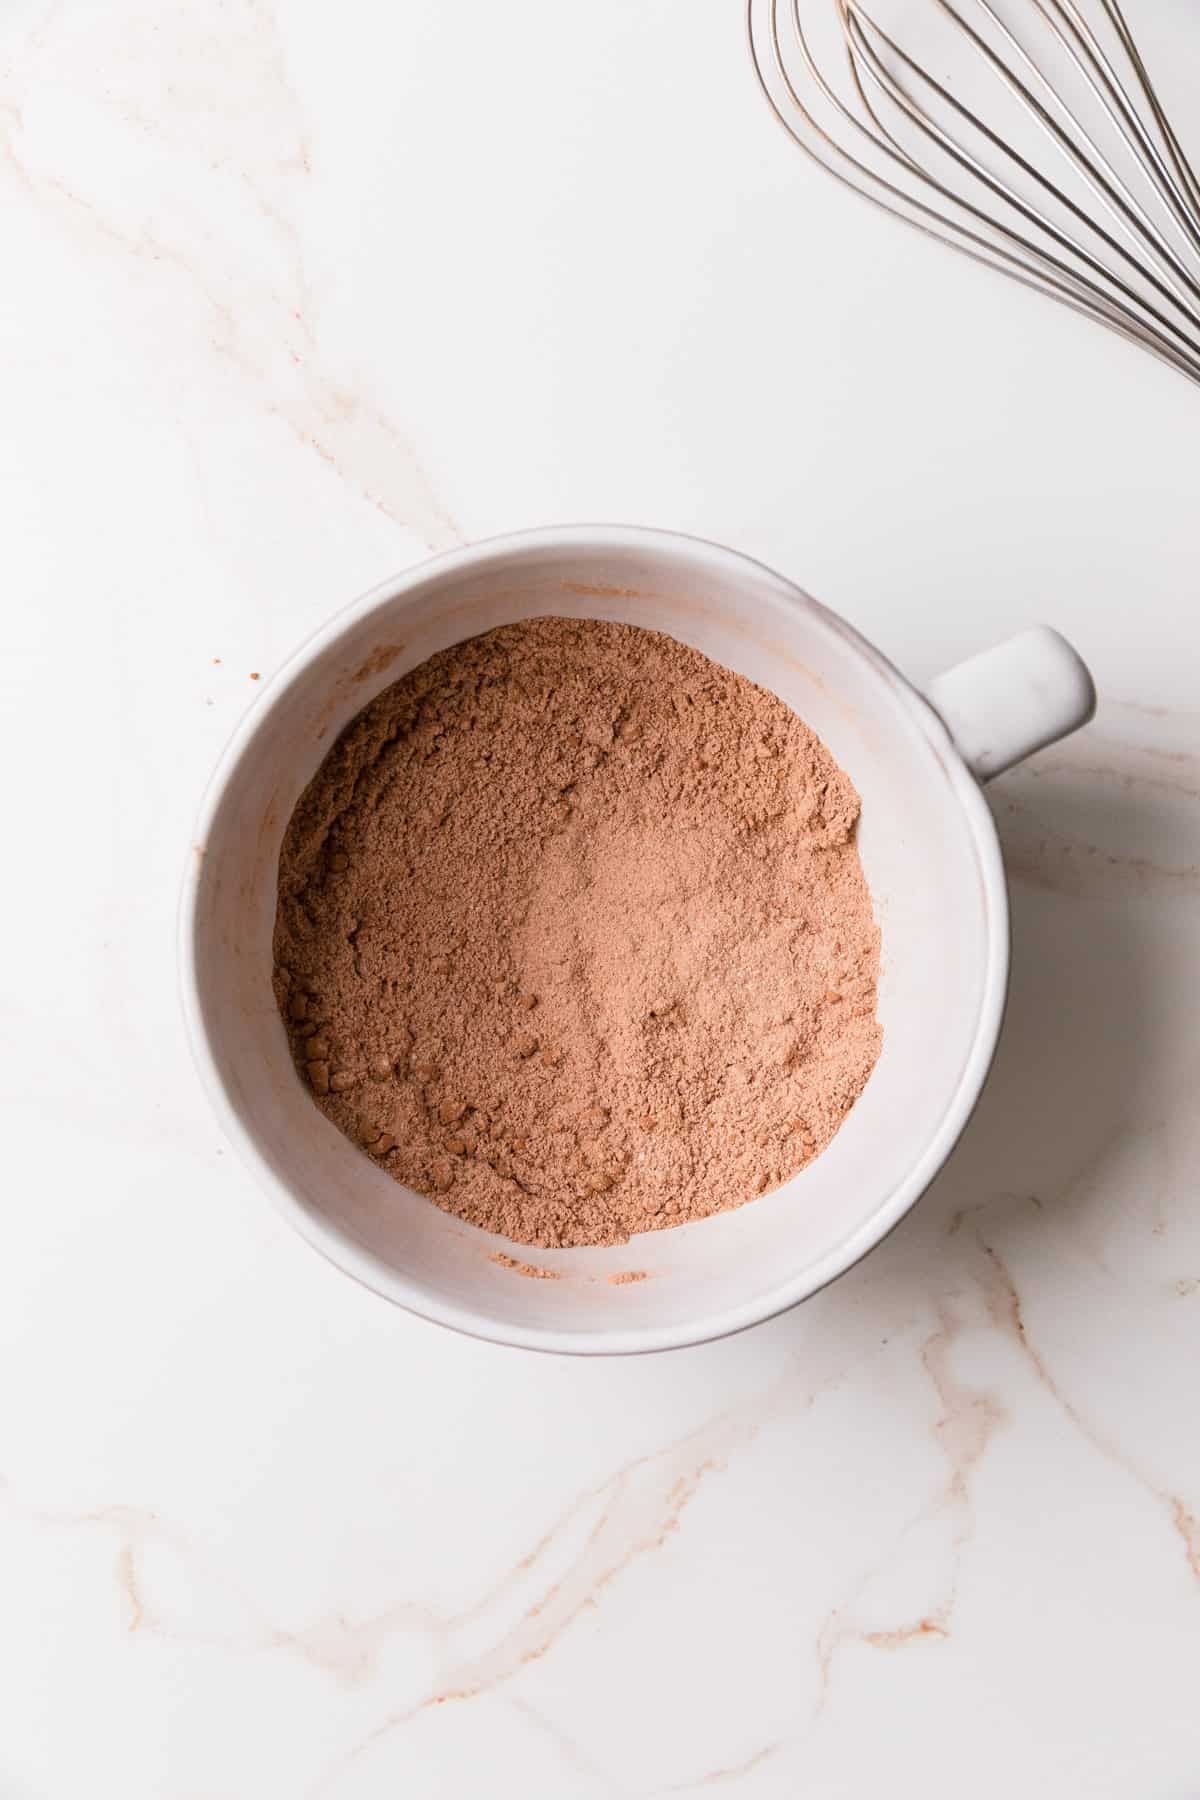
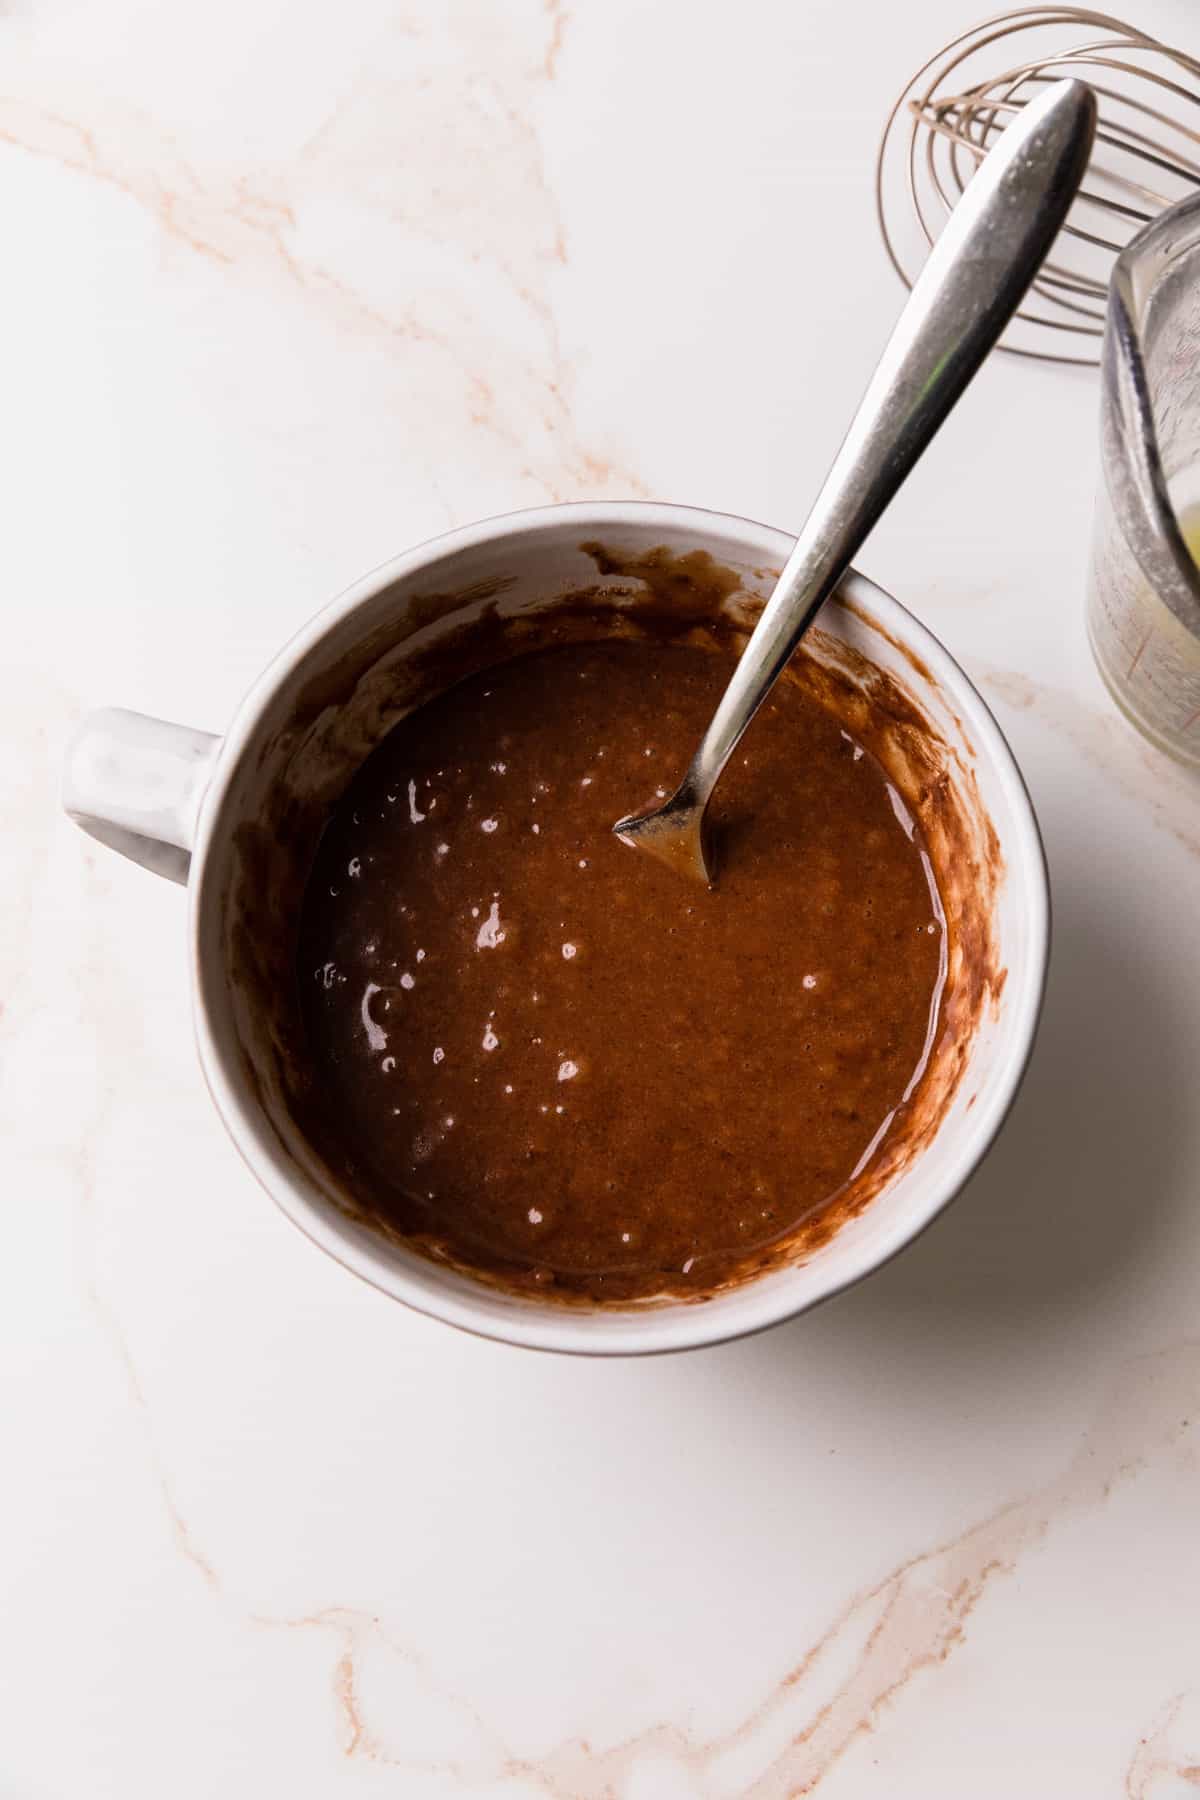
STEP ONE: Add flour, sugar, cocoa powder, and baking powder to a mug. Whisk to combine.
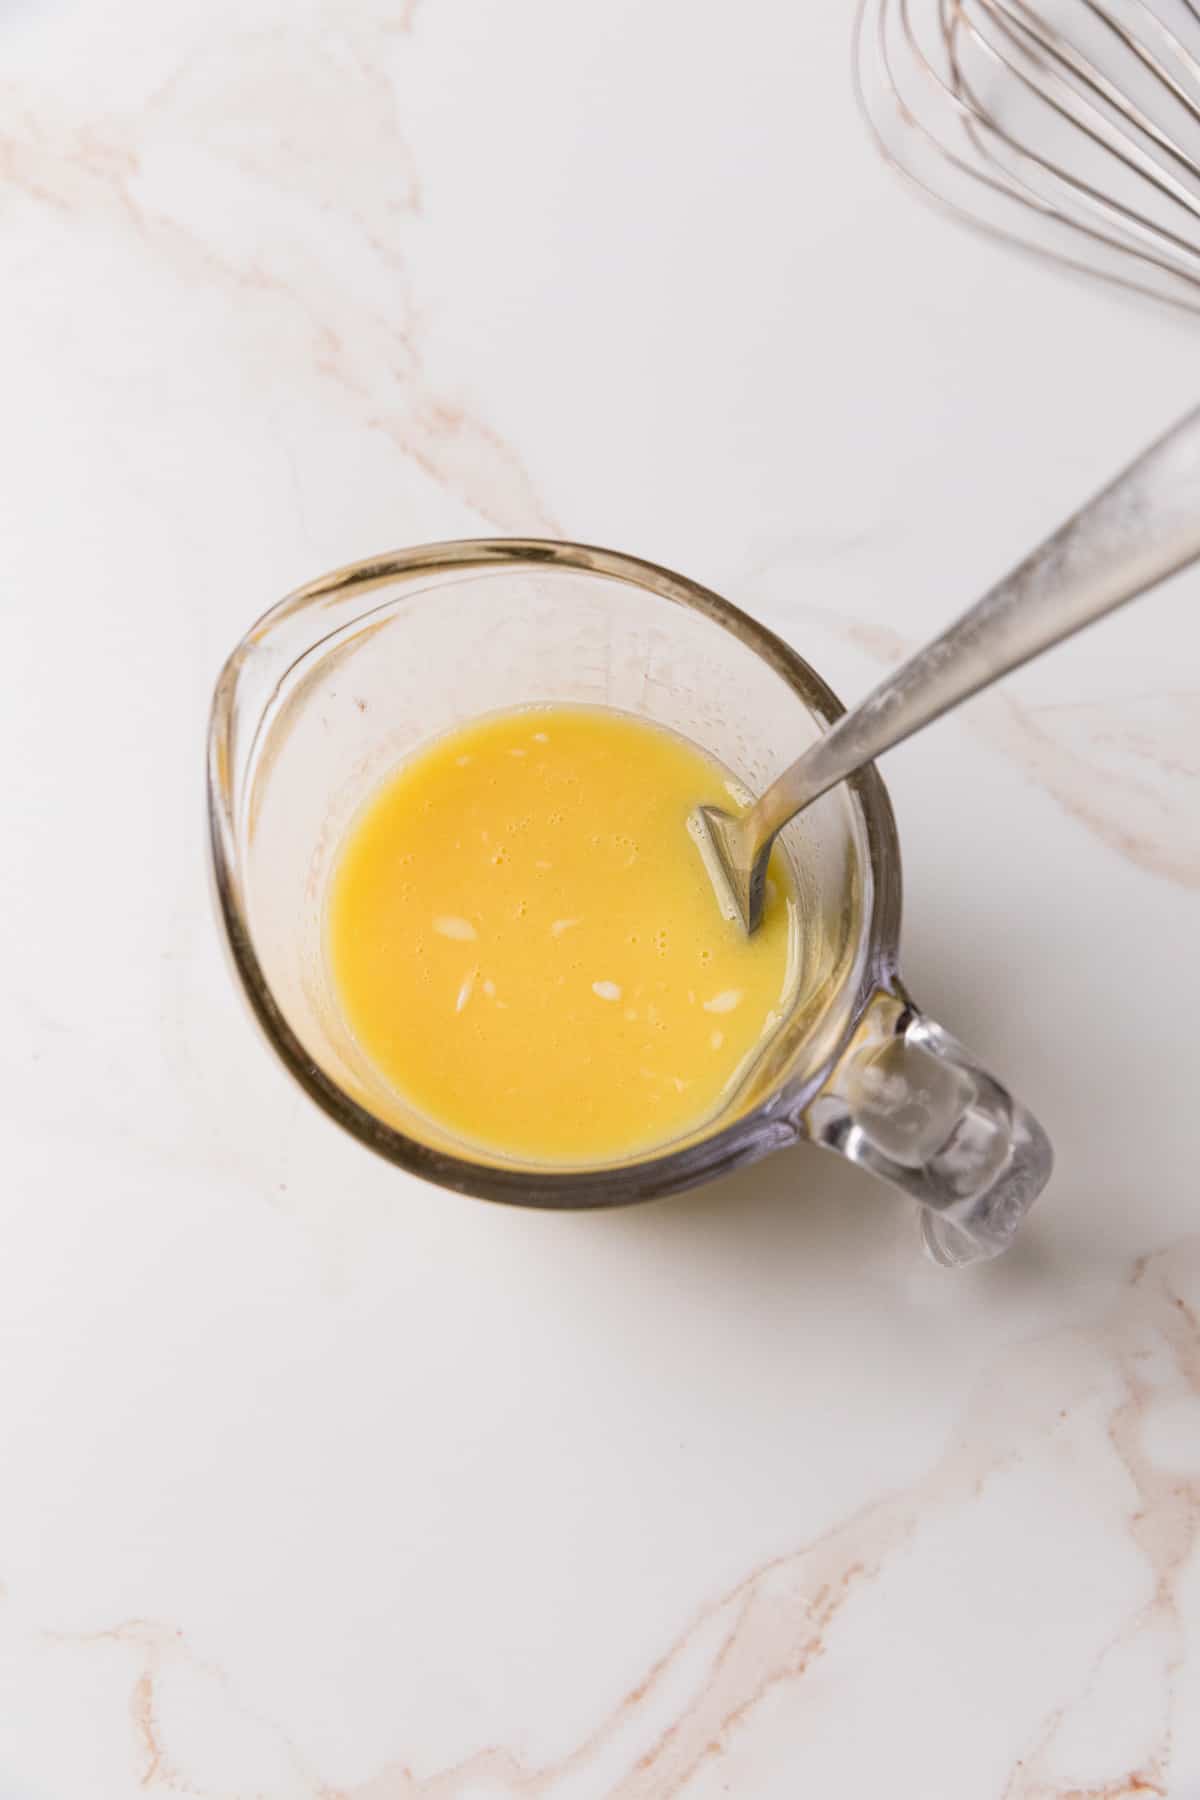
STEP TWO: Melt butter in a separate small bowl or ramekin. Add melted butter, vanilla, milk, and egg to the flour mixture in the mug. Mix well to create a smooth batter, but no need to over mix.
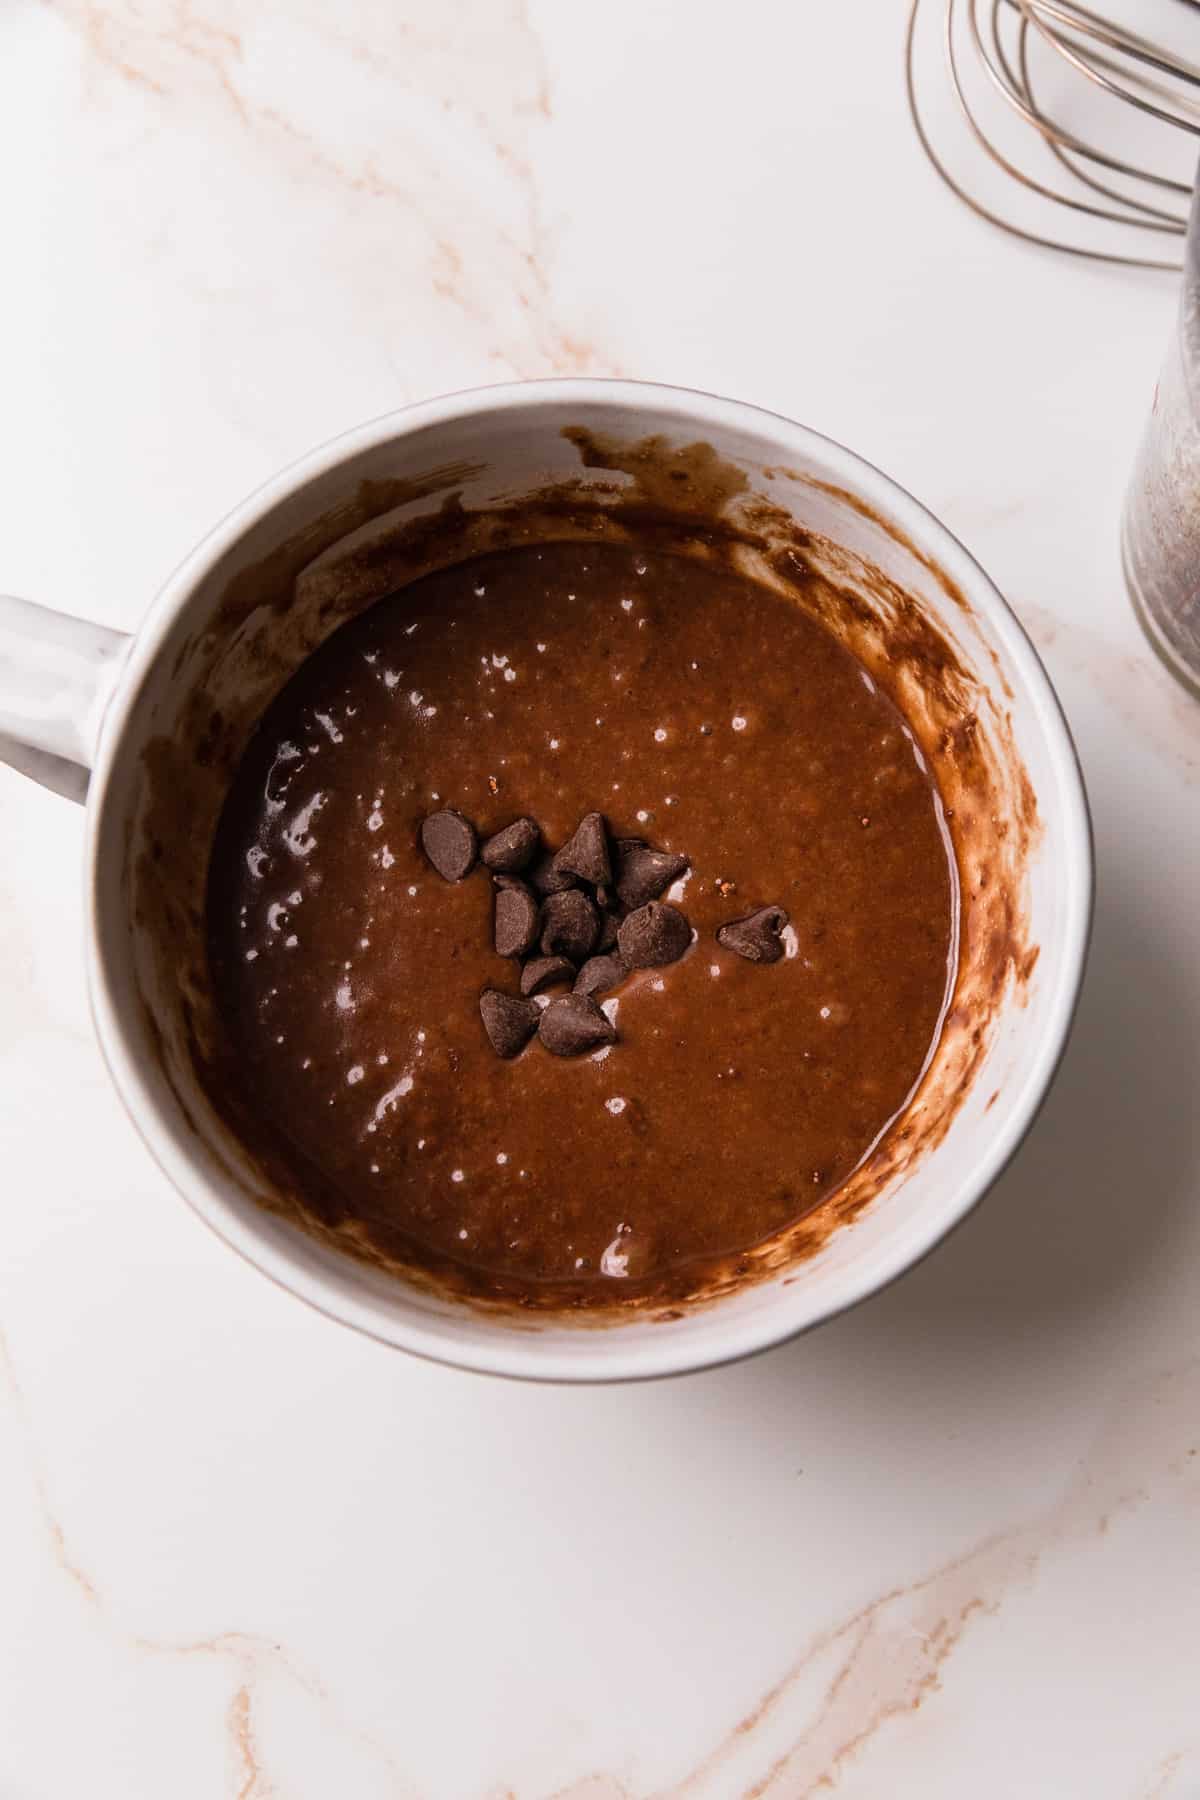
STEP THREE: Pour the chocolate chips into the center of the batter then pour the water over the rest of the batter.
STEP FOUR: Microwave on high power for 1 to 2 minutes. Mine was perfect at one minute and 20 seconds.
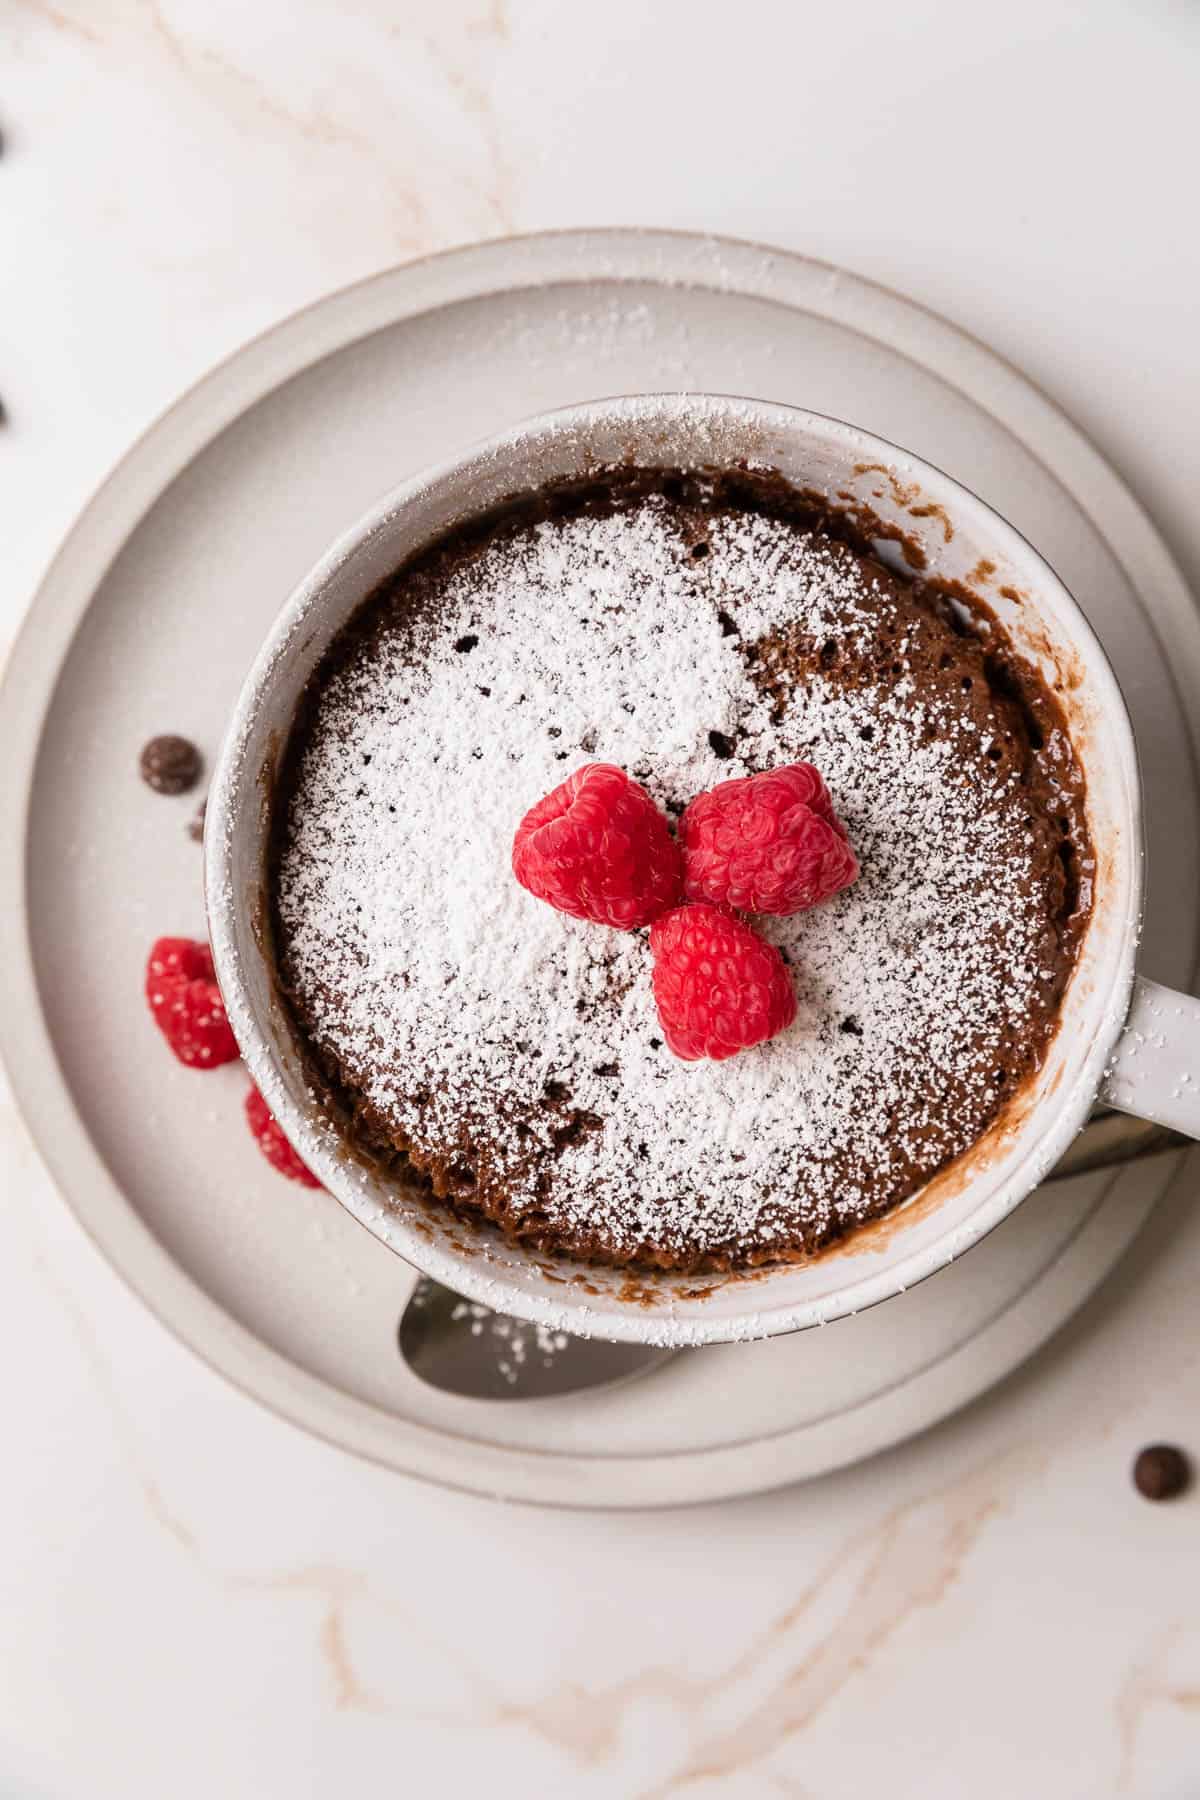
STEP SIX: Let cool for a couple minutes. Dust with powdered sugar, top with a scoop of vanilla ice cream, a drizzle of chocolate sauce, or some caramel sauce.

Variations and Substitutions
Gluten-free: If you're avoiding gluten, simply use a gluten-free flour blend instead of all-purpose flour. You can also use almond flour or coconut flour for a flourless version.
Favorite chocolate: Use your favorite chocolate to make this dessert even more delicious. Dark chocolate, milk chocolate, or white chocolate all work well.
Peanut butter: Swirl in some peanut butter before microwaving for a chocolate-peanut butter combo. Or try some peanut butter chips.
Mint: Add a drop of peppermint extract or some chopped mint leaves for a refreshing twist.
Espresso: Mix in some instant espresso powder for a mocha flavor.
Flourless: For a flourless version, use almond flour or coconut flour instead of all-purpose flour. This will give the cake a slightly nutty flavor and a denser texture.
No eggs: If you don't have eggs on hand or are allergic to them, you can use a flax egg instead. Simply mix 1 tablespoon of ground flaxseed with 3 tablespoons of water and let it sit for a few minutes to thicken before using.
Low carb: To make this dessert lower in carbs, use a sugar substitute like stevia or erythritol instead of granulated sugar. You can also use almond flour or coconut flour instead of all-purpose flour.
Kitchen Tips
When making chocolate mug lava cake, choosing the right mug is crucial. You want a mug that is microwave-safe and can withstand the high temperature without cracking or breaking. Here are some tips to help you choose the right mug for your lava cake and ensure the best results every time.
- Look for a mug made of ceramic or glass. Avoid using plastic or metal mugs as they can't handle the heat.
- The right size mug should be at least 12 ounces in size. This will ensure that the cake has enough room to rise without overflowing.
- Use a mug with a wide mouth. This will make it easier to mix the ingredients and will prevent the cake from sticking to the sides of the mug.
- If you don't have a microwave-safe mug, you can use a ramekin or a small oven-safe bowl instead. Just make sure it's microwave-safe and can withstand the high temperature.
Let cake cool for a minute or two before digging in. The center will be very hot, and you don't want to burn your mouth!
Also, feel free to experiment with different add-ins like peanut butter, caramel, or marshmallows to make your lava cake even more delicious.
How to Store
Firstly, it is important to let your cake cool down completely before storing it. This will prevent condensation from forming inside the container and making the cake soggy. Once cooled, you can store the cake in an airtight container to help keep it fresh.
If you plan on eating the cake within a day or two, you can leave it at room temperature. However, if you want to keep it for longer, it is best to store it in the refrigerator. This will help to extend its shelf life and prevent any spoilage.
To store your cake in the refrigerator, wrap it tightly in plastic wrap or aluminum foil before placing it in the container. This will help to prevent any air from getting in and making the cake dry out. Do this as well if you plan to freeze the cake, but the taste and texture will be best when eaten immediately after baking.
When you are ready to eat your cake, simply remove it from the refrigerator and let it come to room temperature before serving. This will help to restore its texture and flavor.
This cake is best enjoyed fresh and warm, which is easy to do with a quick and simple recipe like this one. While it can be stored for a short period of time, it is always best to enjoy it as soon as possible for the best taste and texture.
FAQ
Yes, you can use cake mix to make chocolate mug lava cake. Simply follow the instructions on the cake mix box and add a tablespoon of cocoa powder to the mix. Then, fill your mug with the cake batter and add a tablespoon of chocolate chips to the center. Microwave for about a minute and a half, and your lava cake is ready to enjoy!
The best way to tell if your chocolate mug lava cake is done is to check the center. When it's done, the edges will be set and the center will be gooey and runny. To check, insert a toothpick into the center of the cake. If it comes out with wet batter, it needs more time. If it comes out with just a few crumbs, it's ready to eat. Keep in mind that microwave wattage can vary, so adjust the cooking time accordingly.
More easy dessert recipe
- No Bake Lemon Pie
- No Bake Pineapple Pie
- Apple Dump Cake
- Booty Dip - Viral TikTok Recipe
- Raspberry Streusel Bars made with Preserves
- Sunbutter Cups - No peanuts!
📖 Recipe
Email me the recipe!
Plus get all our new recipes too!
Microwave Chocolate Mug Lava Cake Recipe for Two
Ingredients
- ¼ cup flour all purpose
- ¼ cup sugar white, granulated
- 2 tablespoon unsweetened cocoa powder
- ½ teaspoon baking powder
- 3 tablespoon butter melted
- ½ teaspoon vanilla extract
- 3 tablespoon milk whole, 2% or low fat; plant based
- 1 egg large
- 3 tablespoon chocolate chips semi sweet
- 1 tablespoon water
Instructions
- Add flour, sugar, cocoa powder, and baking powder to a mug. Whisk to combine.
- Melt butter in a separate small bowl or ramekin. Add melted butter, vanilla, milk, and egg to the flour mixture in the mug. Mix well to create a smooth batter, but no need to over mix.
- Sprinkle the chocolate chips into the center of the batter then pour the water over the rest of the batter.
- Microwave on high power for 1 to 2 minutes. Mine was perfect at one minute and 20 seconds.
- Let cool for a couple minutes.
- Dust with powdered sugar, top with a scoop of vanilla ice cream, a drizzle of chocolate sauce, or some caramel sauce.
Notes
- When making chocolate mug lava cake, choosing the right mug is crucial. You want a mug that is microwave-safe and can withstand the high temperature without cracking or breaking.
- Look for a mug made of ceramic or glass. Avoid using plastic or metal mugs as they can't handle the heat.
- The right size mug should be at least 12 ounces in size (mine was 16 ounces). This will ensure that the cake has enough room to rise without overflowing.
- Use a mug with a wide mouth. This will make it easier to mix the ingredients and will prevent the cake from sticking to the sides of the mug
- If you don't have a microwave-safe mug, you can use a ramekin or a small oven-safe bowl instead. Just make sure it's microwave-safe and can withstand the high temperature.
Mamamary says
Thank you!
Made this tonight for our anniversary dessert after a burger date.
Delicious and easy prep. I did cut the butter to half the amount, sub’d half of sugar with Truvia, used skim milk, and just 2 Tblsp dark chocolate chips. I used one Tblsp of (this morning’s) cold coffee over top in place of water and it a gave a nice rich result.
This recipe completely filled my 16 oz. ramekin.
This is a keeper! 👏😋👍
Nikole Berg says
So glad this was a hit for your anniversary dessert! I'm honored you tried the recipe! Thank you for all your tips on how to lighten it up. And I'm going to try the coffee in place of water next time-love mocha flavors. Happy Anniversary!
Ashley Q says
I am so glad this was the recipe I clicked on to satisfy my sweet tooth. It turned out amazing. I’ll be making this over and over again!
Nikole Berg says
Yay, Ashley! So glad to hear you loved the mug cake...it's my go-to when chocolate cravings hit. I hope you added some vanilla ice cream? It takes it to the next level. Thank you for your review and 5 stars!!