
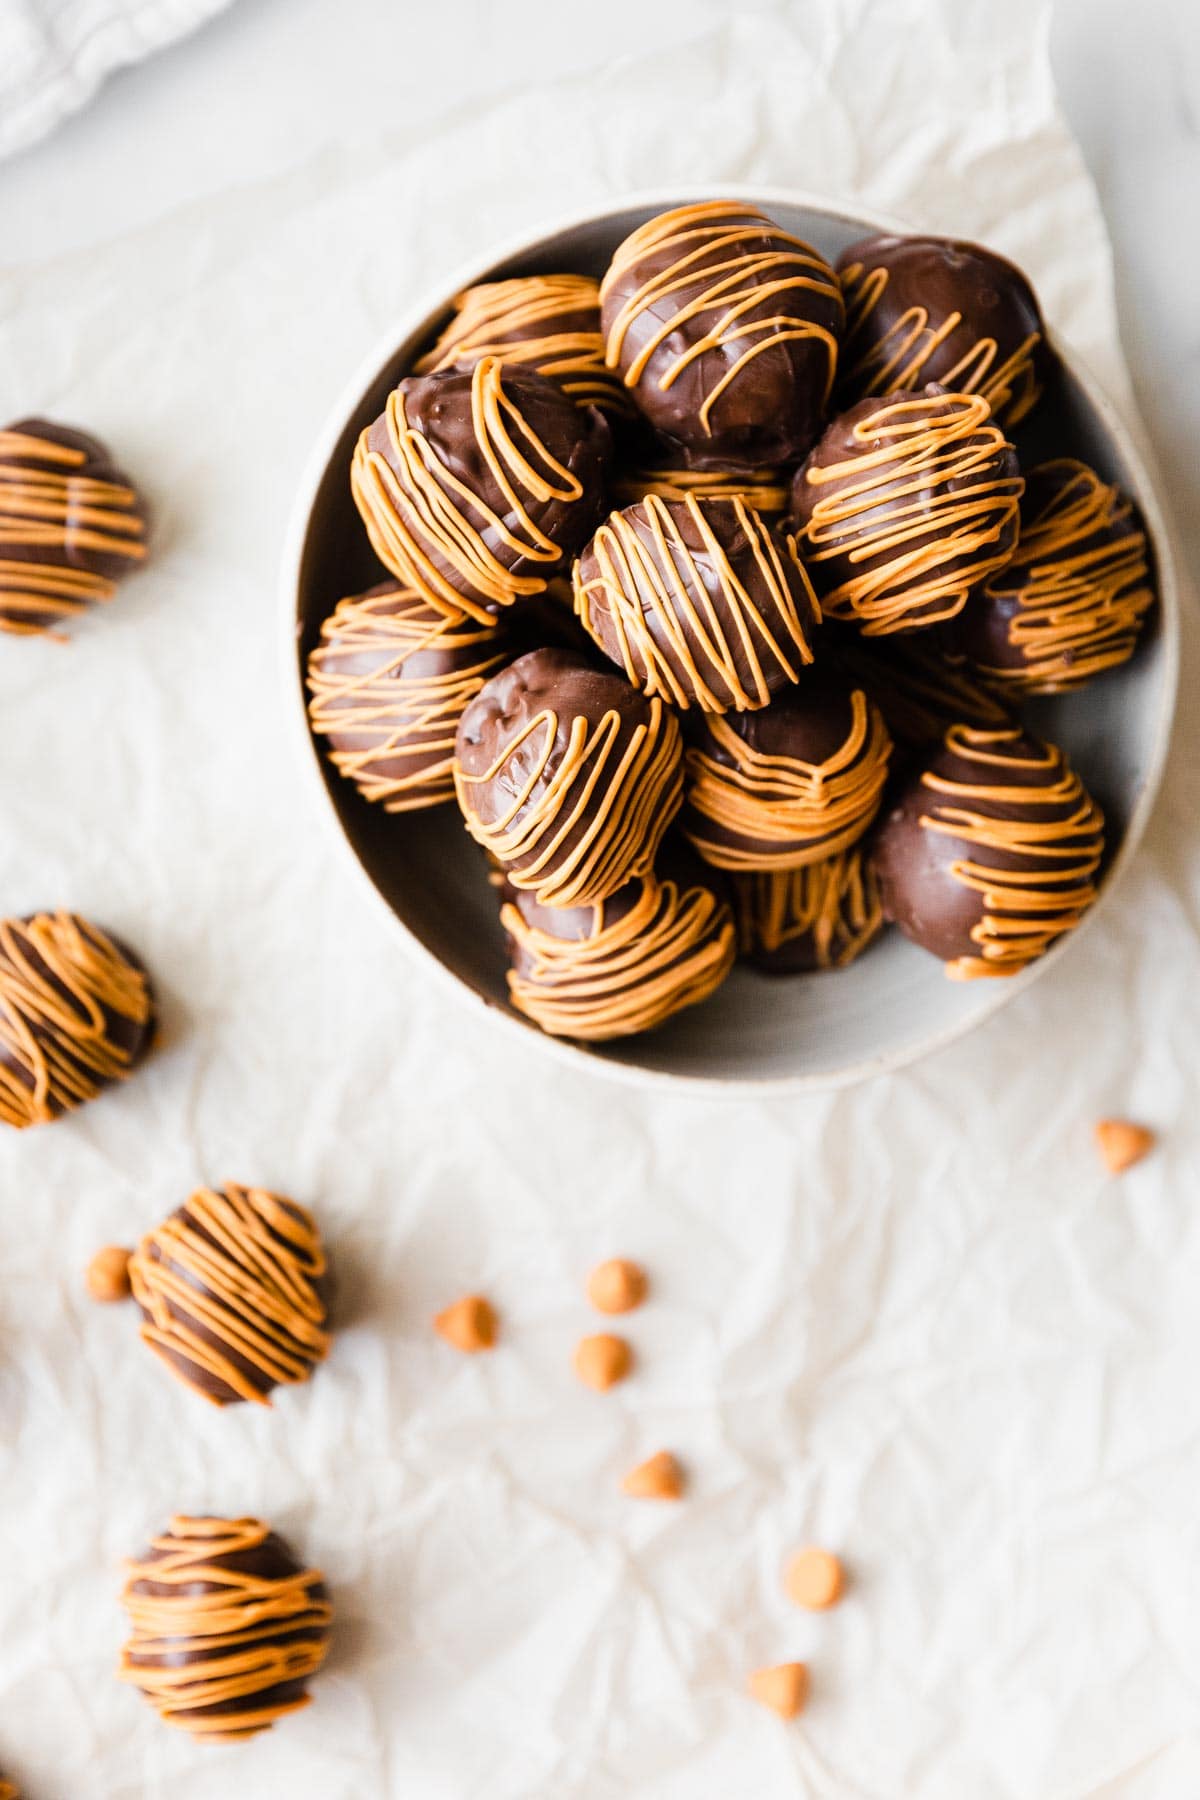
These Peanut Butter Truffles, also known as peanut butter balls, are a delicious, no bake treat anyone can make. Made with just 4 ingredients including cookies and cream cheese. Ready in less than an hour!
Email me the recipe!
Plus get all our new recipes too!
Why you'll want to make it
It's quick and easy! Craving a sweet treat but don't want to spend all day in the kitchen? Then this recipe is for you! This no bake treat is simple to make and you only need 3 ingredients (4 if you include the optional drizzle). This recipe comes together in less than an hour, but they look and taste like you spent all day on them.
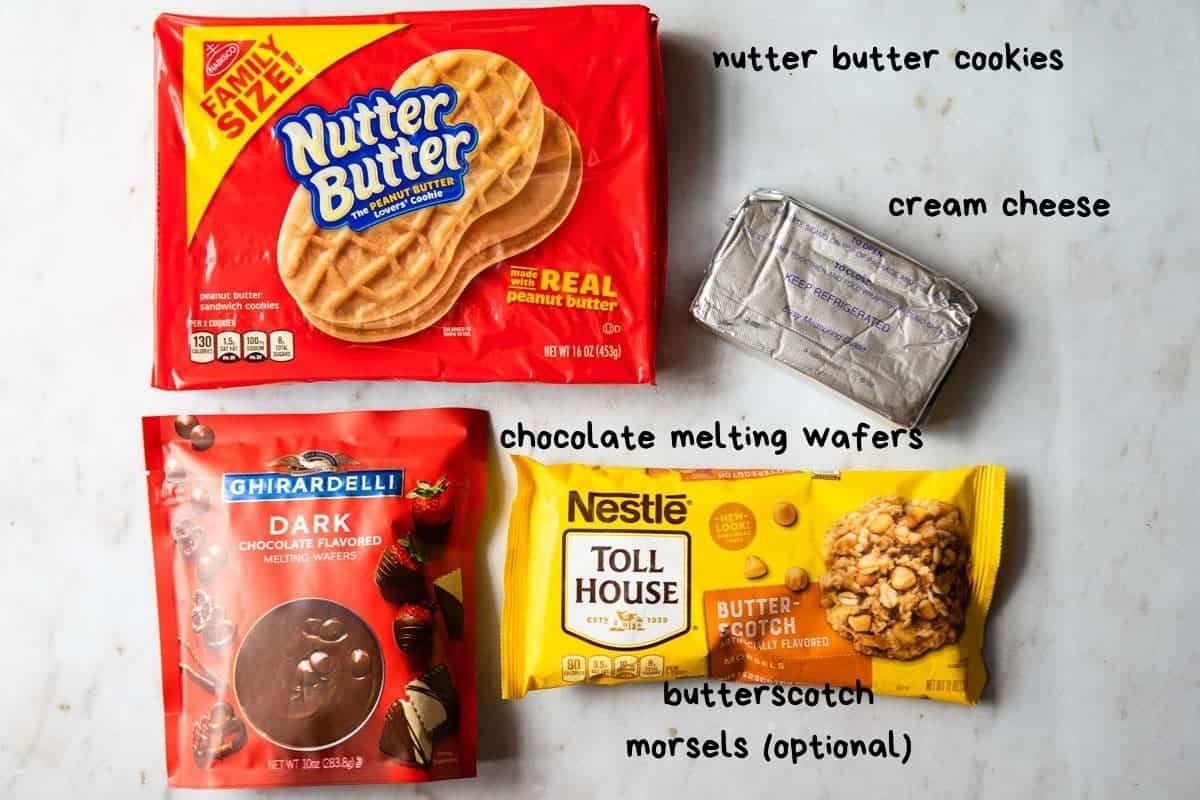
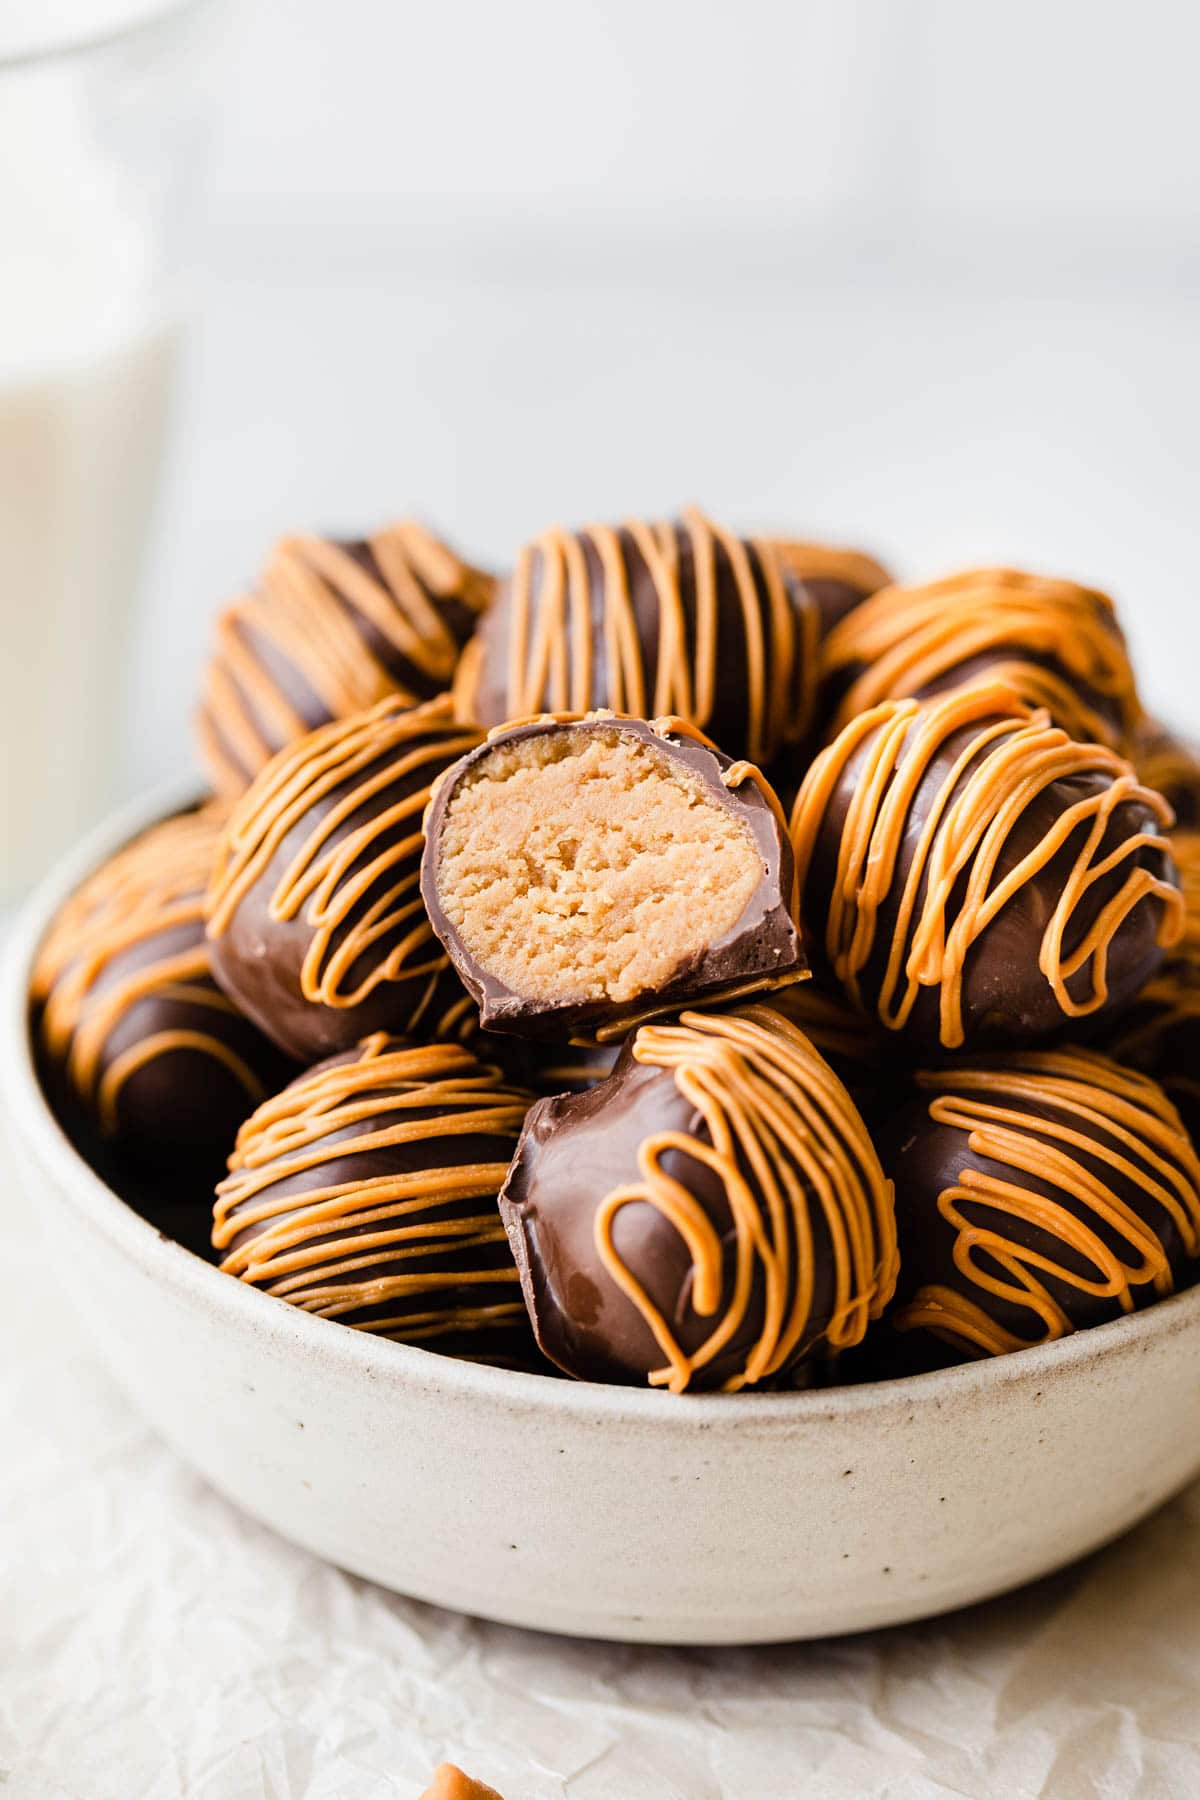
It's made with easy to find ingredients. What I love about this recipe is that it only uses 3 ingredients-yes, you heard that right. You only need peanut butter sandwich cookies, melting chocolate, and cream cheese. Decorating the truffles is totally optional, but does add a nice touch. In that case add some butterscotch morsels or white chocolate.
It's a versatile treat with just the right amount of sweetness. These peanut butter truffles aren't too sweet thanks to the cream cheese and dark chocolate. They are perfect for making ahead and look terrific on the dessert table for holidays, buffets, and pot lucks.
Ingredients
Step by step instructions
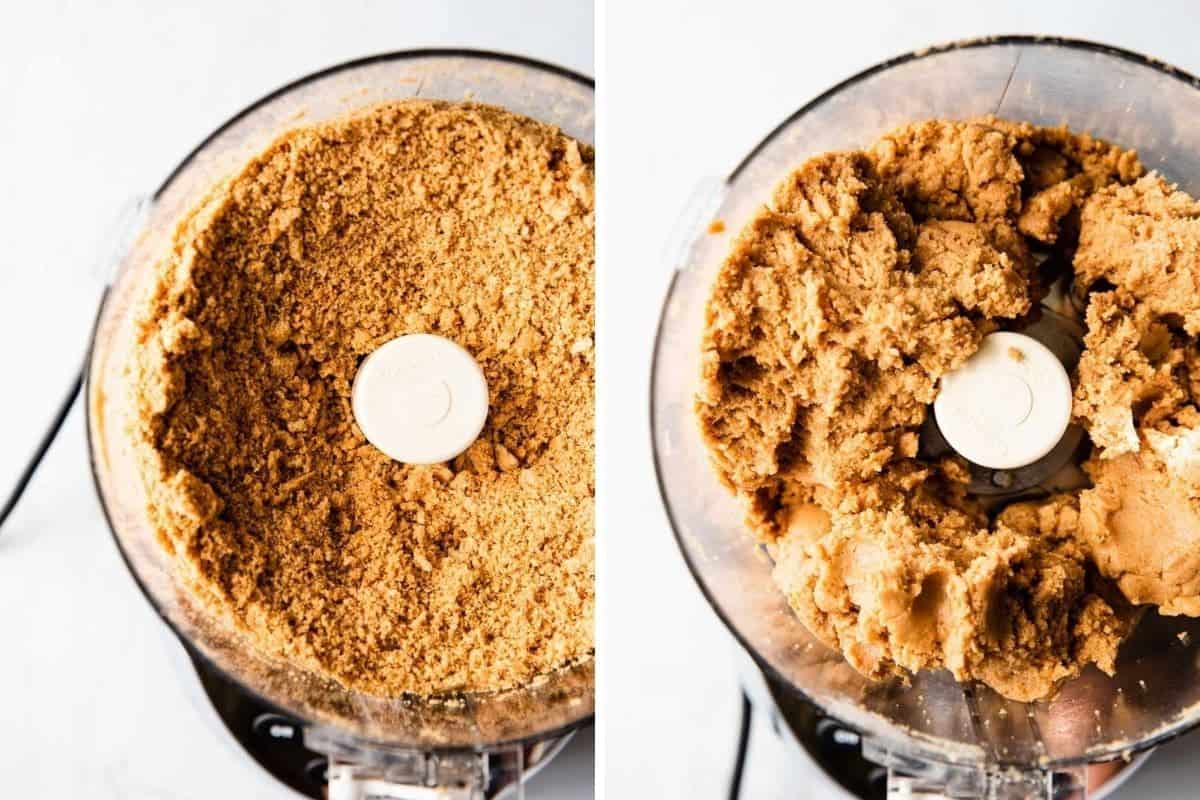
Dump entire package of cookies into a food processor. Pulse until crumbs form. Add room temperature cream cheese and process until well combined. The filling will resemble cookie dough.
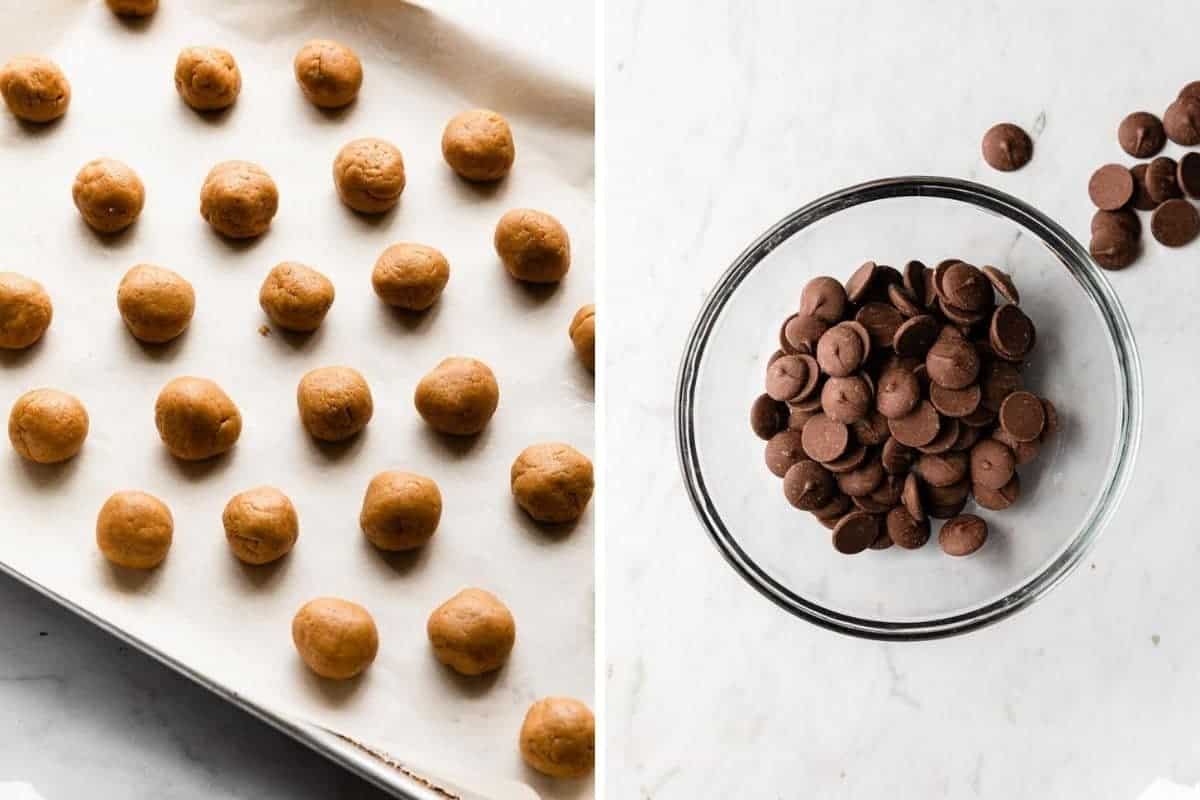
Line a large baking sheet with parchment paper. Using a small melon baller, form 36 balls by rolling the filling in the palms of your hands. Place in refrigerator for about 10 minutes.
To melt chocolate in the microwave, add the wafers to a glass or microwave safe bowl. Microwave in 30 second increments, until completely melted, stirring in between.
Roll each ball in the melted chocolate. I like to use two forks to do this. Let the excess drip off before placing the balls back on the baking sheet. Place back in the fridge until set.
Microwave butterscotch morsels with 1 teaspoon oil in 15 second increments.,
Pour melted butterscotch into a piping bag or sandwich bag. If using the sandwich bag, push butterscotch to one corner of the bag. Snip the corner off, being sure you don't cut too much off. You want the hole to be quite small so you can create a thin drizzle.
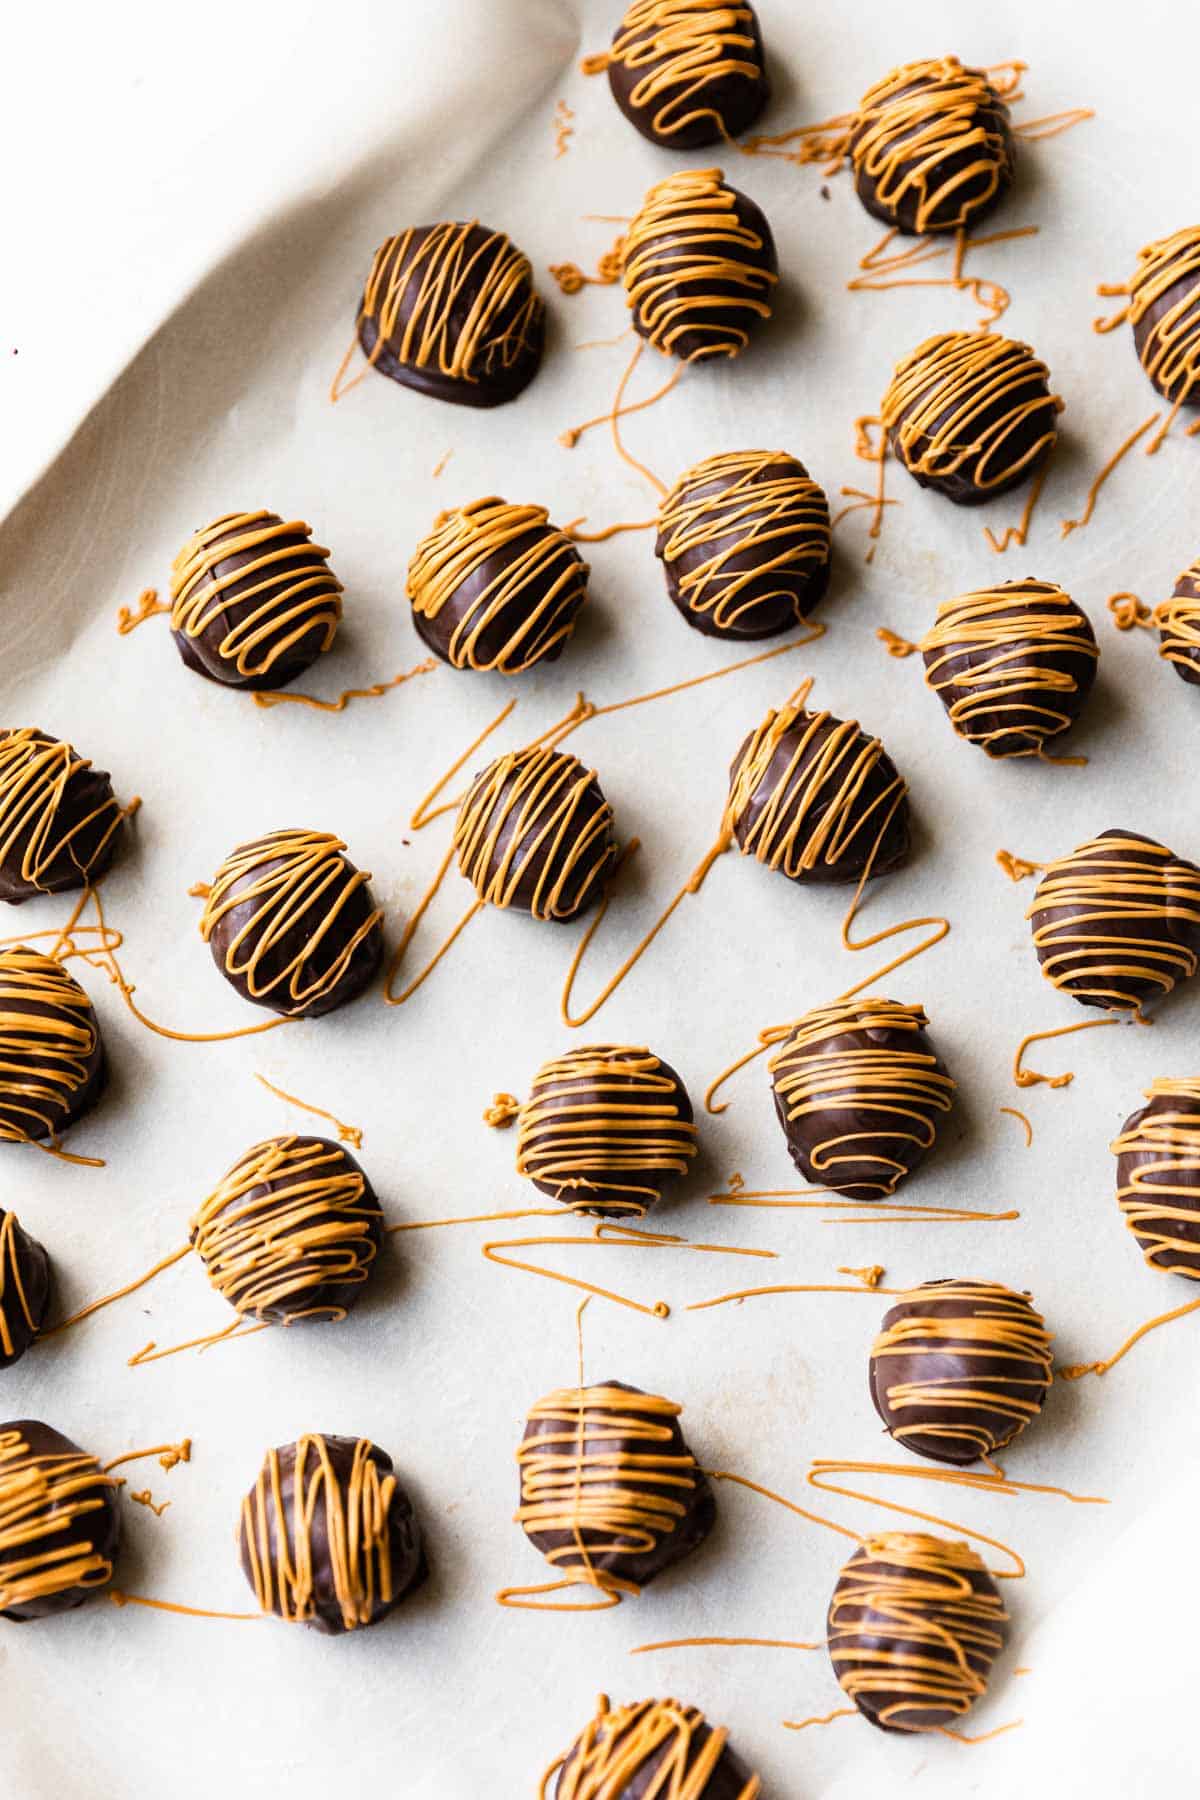
Place Peanut Butter Truffles back in the fridge to allow butterscotch to set, about 5 minutes.
Tips and variations
I highly recommend using melting chocolate wafers or discs as pictured above. If you've ever had chocolate seize up on you, then you'll appreciate how easy the discs are to use.
Use milk chocolate in place of dark.
I love the look and taste of the butterscotch drizzle for these Peanut Butter Morsels, but feel free to use white chocolate, milk chocolate, or more dark chocolate. Another idea is to dip them in sprinkles right after coating them in chocolate. This is a great way to decorate them for a specific holiday or event.
The truffles will form "feet" on the bottom where they were sitting on the baking sheet. If they bother you or are excessively large, you can use a sharp knife to trim them off.
If you want to make them ahead, you can form the balls and refrigerator or freeze them until ready to use. Or you can make them as written and store them in the refrigerator for a week or freeze for up to 3 months.
More Easy Desserts to try
Allergy friendly Sunbutter Cups
Pumpkin Chocolate Chip Muffins
One Bowl Pumpkin Chocolate Chip Bundt Cake

📖 Recipe
Email me the recipe!
Plus get all our new recipes too!

Peanut Butter Truffles
Equipment
Ingredients
- 16 oz package peanut butter sandwich cookies such as Nutter Butters
- 8 oz cream cheese softened
- 10 oz dark chocolate melting wafers melted
- 1 cup butterscotch morsels for drizzle, optional
- 1 teaspoon oil coconut, vegetable, canola- if using for drizzle
Instructions
- Place all the peanut butter sandwich cookies in the food processor. Pulse until crumbs form.
- Add cream cheese and mix until well combined and mixture resembles cookie dough.
- Use a melon baller to scoop enough filling to make each truffle. Roll the mixture in the palms of your hands to form small balls. Make 36 balls and place them on a baking sheet lined with parchment paper. After formed, place in refrigerator for about 30 minutes.
- Dip each ball into melted chocolate, covering completely. I like to use two forks, but you can use any utensils or toothpicks. Let the excess chocolate drip off the truffle before placing back onto parchment paper. To melt chocolate: place chocolate discs in microwave safe bowl. Microwave in 30 second increments, stirring between intervals.
- Place truffles back in the refrigerator until chocolate is set, about 15 minutes.
- To make the butterscotch drizzle: place 1 teaspoon oil and 1 cup of morsels in a microwave safe bowl. Microwave in 15 second intervals, stirring in between until melted. Spoon into a piping bag fitted with the smallest tip or a sandwich bag. Push the melted butterscotch into one corner of the bag. Snip a very small piece off the corner. Drizzle over truffles.
- Place back in the refrigerator to set up, about 5 minutes.
Notes
- I highly recommend using melting chocolate wafers or discs as pictured above. If you've ever had chocolate seize up on you, then you'll appreciate how easy the discs are to use.
- Use milk chocolate in place of dark.
- I love the look and taste of the butterscotch drizzle for these Peanut Butter Morsels, but feel free to use white chocolate, milk chocolate, or more dark chocolate. Another idea is to dip them in sprinkles right after coating them in chocolate. This is a great way to decorate them for a specific holiday or event.
- The truffles will form "feet" on the bottom where they were sitting on the baking sheet. If they bother you or are excessively large, you can use a sharp knife to trim them off.
- If you want to make them ahead, you can form the balls and refrigerator or freeze them until ready to use. Or you can make them as written and store them in the refrigerator for a week or freeze for up to 3 months.
Alice says
Just looks so yummy.
Lee says
This looks really easy to make! Will white chocolate work as well?
Nikole says
Yes, I think it would be great with white chocolate too!